
Table of Contents
Introduction
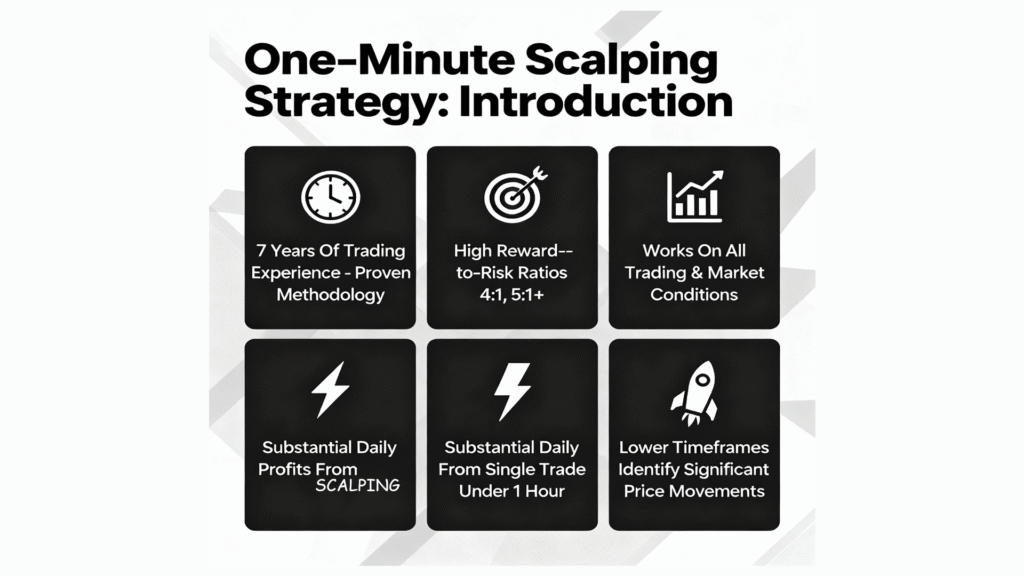
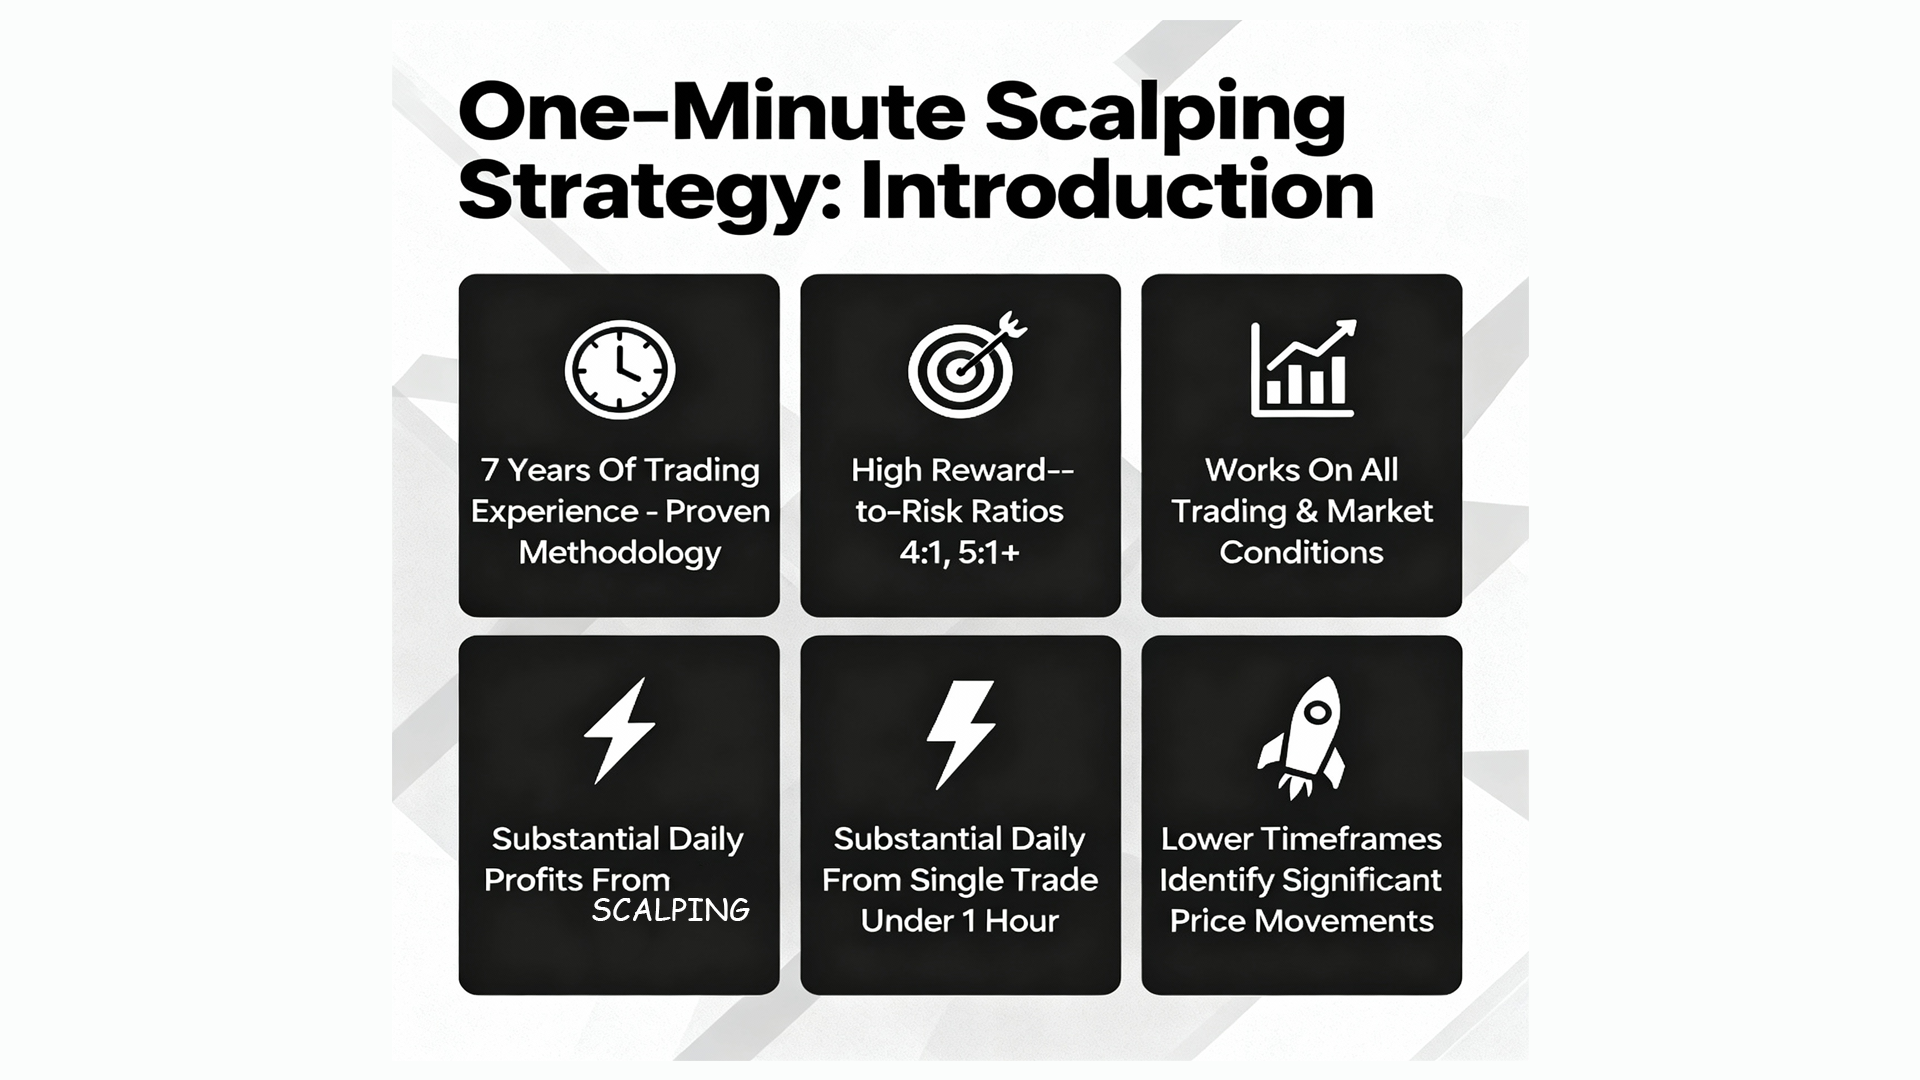
After seven years of dedicated trading experience, a proven methodology has emerged—a one-minute scalping strategy designed to deliver consistent results for both beginner and advanced traders. This approach transcends conventional trading wisdom by combining high reward-to-risk ratios, repeatable entry signals, and professional-grade execution into a framework that works across all trading pairs and market conditions.
The beauty of this strategy lies in its simplicity and universality. Whether you’re trading forex, cryptocurrencies, futures contracts, or any other financial instrument, the core mechanics remain the same. More importantly, this approach can generate substantial daily profits from a single trade executed in under one hour, making it ideal for traders with limited time commitment.
Unlike most scalping strategies that focus on capturing small price movements of just a few pips, this methodology is built on a fundamentally different principle: using lower timeframes to identify and exploit significant price movements that can deliver 4:1, 5:1, or even higher reward-to-risk ratios.
Understanding Scalping: Beyond the Traditional Definition
Many traders carry a misconception about what scalping truly is. The popular belief suggests that scalping is about catching small market moves and profiting from minimal price fluctuations. However, this represents only a surface-level understanding of the strategy.
True scalping is about using lower timeframes to execute trades and exit your position within 10 to 15 minutes, or at most within one hour. The emphasis is not on the magnitude of price movement, but rather on the time duration and exit strategy. This distinction fundamentally changes how you approach market entries and position management.
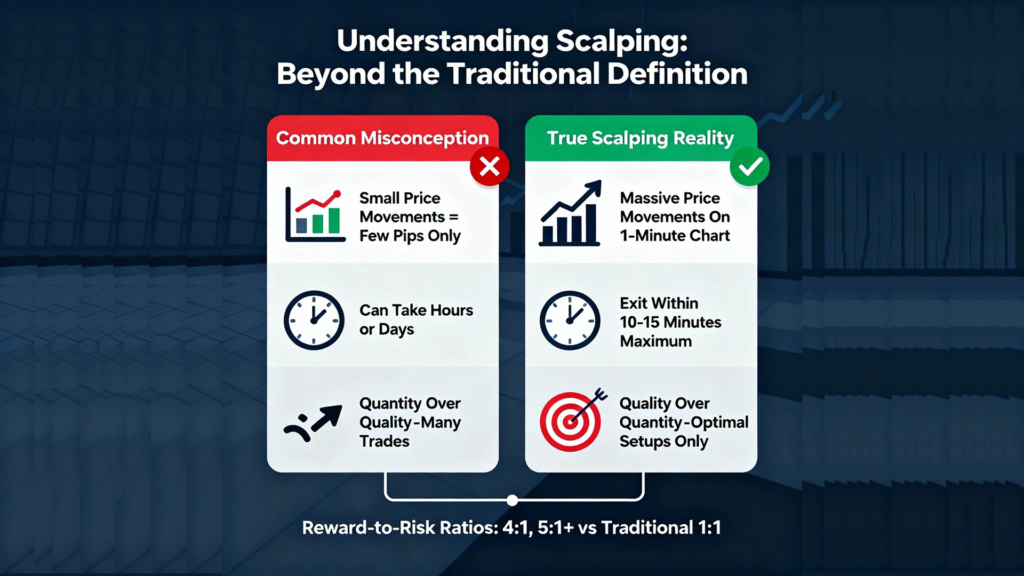
With this strategy, traders regularly capture massive price movements on the one-minute chart—significantly larger than the typical few-pips expectation. The reward-to-risk ratios achieved are not the conventional 1:1 or unfavorable negative ratios; instead, traders consistently see 4:1, 5:1, and sometimes higher reward-to-risk rates on their positions.
This distinction is critical: the strategy focuses on quality trade entries rather than quantity, enabling traders to maintain high win rates while waiting for optimal setups rather than forcing trades into marginal opportunities.
The Three-Step Framework: Mastering the Setup
The entire strategy is built on three foundational steps. Master each of these, and you master the setup entirely.
Step One: Identifying 15-Minute Highs and Lows
The first step requires identifying and marking key resistance and support levels on the 15-minute timeframe. These levels serve as your foundational reference points for the entire trading setup.
When looking at your 15-minute chart, you’re searching for highs and lows that price has not yet reached or touched. The distinction is important: you’re not marking every high and low on the chart. Instead, you’re identifying untouched price levels—the points where buyers or sellers may have pending orders or protective stop losses.
For example, if you observe a bullish candle followed by a bearish candle and continuation lower, you might identify a high that price briefly touched but failed to exceed again. This untouched high becomes a valid reference point for your trading setup.
The key principle here is selecting highs and lows that maintain structural importance. Not every price point is created equal; some levels have more significance based on how price approached and rejected them. This quality-over-quantity mindset becomes increasingly important as you refine your trading approach.
Step Two: Waiting for the Wick Rejection
The second step introduces the concept of wick rejection, which serves as your primary confirmation signal for a valid setup.
Wick rejection occurs when price reaches one of your marked highs or lows but closes on the opposite side of that level. For a valid setup:
- If you’re targeting a high, you want price to reach the high but close below it
- If you’re targeting a low, you want price to reach the low but close above it
This closing action is crucial because it demonstrates that although price visited the level (taking liquidity from stop losses), the broader market sentiment rejected that level, creating a reversal condition. The wick represents the rejection, and the closing price on the opposite side confirms it.
Here’s a critical distinction: when examining these patterns, the color and direction of the candle matter. As price approaches a high while moving upward, you ideally want to see the candle still maintaining a bullish color, indicating continued buying pressure despite the ultimate closure below the high. A strong rejection candle closing far from the high can actually reduce the probability of a valid entry, as it suggests stronger selling pressure that may have already played out.
Step Three: Switching to the One-Minute Timeframe for Entry
Once you’ve identified a valid wick rejection on the 15-minute chart, the third step involves switching to the one-minute timeframe to identify your precise entry point.
The moment a new 15-minute candle opens (meaning the previous candle has closed with the wick rejection), you immediately move to the one-minute chart. This is where the actual trade entry is determined, and it’s why this part of the strategy is called the sniper entry—precision and timing are everything.
On the one-minute timeframe, you’re looking for a closure above the opening price of that new 15-minute candle (if you’re trading long) or a closure below (if you’re trading short). This closure represents a directional flip, confirming that the anticipated move is now in progress.
The Sniper Entry Technique: Precision Trading
The sniper entry is where this strategy truly differentiates itself. After seven years of development, this entry method represents the distillation of professional trading experience into an actionable framework.
Identifying Your Entry Points
Once the wick rejection has occurred and the new 15-minute candle has opened, switch to your one-minute chart and mark the opening price of that new candle. This price level becomes your reference point.
Price may behave in several ways:
- Price opens and immediately moves in your intended direction, potentially retouching the opening level before accelerating higher or lower
- Price opens lower (for a short setup) and reaches the marked low of the 15-minute candle, but you specifically look for no strong displacement below this level before reversing
- Price consolidates briefly around the opening level before eventually breaking in your intended direction
The entry signal fires the moment price closes above the reference level (for longs) or closes below it (for shorts) on the one-minute timeframe. This closure indicates that the directional move is confirmed.
Entry Options Based on Risk Tolerance
Depending on your risk management preferences, you have several entry options:
Aggressive Entry: Enter immediately when the one-minute close occurs above (or below) your reference line. This provides the earliest entry but comes with tighter profit margins depending on subsequent price action.
Conservative Entry: Wait for a retracement back toward the opening price level or wait for a subsequent candle to confirm the direction before entering. This reduces the number of early-exit scenarios but may result in slightly larger stop losses.
The recommended approach for most traders involves entering close to the reference line with a stop loss placed either:
- Below the one-minute candle that broke above the reference line, or
- Below the 15-minute candle for additional safety
Target Setting and Profit Taking
Effective target selection separates profitable traders from those who exit prematurely or allow winners to turn into losses.
Identifying Your First Target
Your first target is the next 15-minute swing point—typically the nearest untouched high or low in the direction of your trade. If trading long, this might be a previous 15-minute high that hasn’t been reached since the current setup began. If trading short, it’s the next untouched 15-minute low.
You may identify multiple potential targets across different timeframes. For example:
- The nearest 15-minute swing high (first target)
- The London session high (if you’re trading during early Asian hours)
- The New York session high (if trading during London hours)
Break-Even Management and Partial Profits
As price moves toward your target, consider implementing break-even stops and partial profit-taking at strategic intervals:
- When price reaches 50% of your intended range, consider moving your stop loss to break-even or taking a partial profit
- This approach locks in gains while allowing the remaining position to run toward your full target
Some professional traders prefer to stay in the entire position until the first target is reached, while others scale out incrementally. Your risk tolerance and market volatility should guide this decision.
High-Probability Levels: Focus on Quality Over Quantity
A defining characteristic of successful traders is their ability to distinguish between marginal and high-probability trading opportunities. Implementing this quality-filter approach directly elevates your win rate and reduces the number of false signals.
Inside Imbalances
Valid gaps or imbalances represent areas where price moved significantly but left untouched price levels. Highs and lows within these imbalances have higher probability of triggering your setup because:
- They represent areas where stop losses are likely clustered
- They align with market structure, not random price points
- They often coincide with the direction of the overall market move
For example, if price moves sharply downward and then partially fills that gap with an upward move, the high of that upward retracement becomes a high-probability level for a potential short entry.
Structural Highs and Lows
Market structure highs and lows represent key turning points where price failed to continue. These include:
- Levels where price failed to close above a previous high (creating a breaker structure)
- Levels where price failed to close below a previous low
- Points where the overall market structure shifted from bullish to bearish or vice versa
These structural levels have higher probability because they’re not arbitrary—they represent previous market rejections and failed breakout attempts.
Session-Based Highs and Lows
Different trading sessions have distinct characteristics and generate their own significant price levels:
- Asia Session: 20:00 to midnight (UTC)
- London Session: 02:00 to 05:00 (UTC)
- New York Session: 07:00 to 10:00 (UTC)
A particularly high-probability setup occurs when one session’s market takes a previous session’s high or low but fails to close beyond it. For instance, if New York’s opening move takes the London high but the daily close remains below it, this creates a valid wick rejection setup with elevated probability.
Avoiding Low-Probability Zones
Professional traders excel not just at identifying good setups, but at avoiding poor ones. Consider skipping setups that occur:
- Inside ranging price action without structural support
- Where the wick rejection is extremely strong and bearish (or bullish), suggesting the move has already occurred
- In areas of price confusion with multiple contradictory signals
- Without alignment to session-based levels or structural highs and lows
The discipline to wait for higher-probability entries is what separates consistent traders from those who chase marginal trades.
Why This Strategy Works: The Core Principles
Universal Application Across Markets
This strategy’s effectiveness stems from its foundation in price action and market structure—principles that transcend specific markets. Whether trading EUR/USD forex pairs, Bitcoin, crude oil futures, or stock index contracts, the underlying mechanics remain identical.
The two-timeframe approach (15-minute for structure, 1-minute for entry) adapts seamlessly to different market conditions, volatility levels, and trading sessions.
High Reward-to-Risk Profile
By focusing on wick rejections at key structural levels, this strategy inherently identifies setups where the risk (stop loss below or above the structure) is small relative to the potential profit target. This mathematical advantage compounds over time, creating a positive expectancy in your trading results.
Time Efficiency
Complete trade execution within minutes or at most an hour means you’re not tied to your screens all day. Professional traders can identify and execute multiple high-probability setups throughout the trading day, maximizing opportunity while maintaining work-life balance.
Implementation Checklist: From Concept to Execution
Before taking any trade using this strategy, verify these conditions:
15-Minute Setup Confirmation:
- Identified a valid high or low (untouched by recent price action)
- Price has reached this level (taking liquidity)
- Price has closed on the opposite side (wick rejection confirmed)
- The level aligns with a high-probability category (imbalance, structure, or session level)
One-Minute Entry Preparation:
- New 15-minute candle has opened
- Marked the opening price as your reference level
- Identified your target level on the 15-minute chart
- Determined your stop loss placement (below/above candle or structural level)
Entry Execution:
- Price closes above (or below) your reference level on the one-minute chart
- Entry conditions are confirmed
- Stop loss and target are predetermined before entry
- Position size is calculated based on your account risk (1-2% maximum)
Conclusion: From Strategy to Success
The one-minute scalping strategy with sniper entries represents far more than a simple trading setup. It embodies seven years of professional trading refinement, distilled into an accessible framework that works for traders at all experience levels.
Success with this strategy requires mastering three core steps: identifying valid highs and lows on the 15-minute timeframe, confirming wick rejections, and executing precise one-minute entries. More importantly, it demands the discipline to focus on quality over quantity—waiting for high-probability setups at structural levels rather than chasing marginal opportunities.
The beauty of this approach is its reproducibility. Traders can execute the same setup repeatedly across different currency pairs, cryptocurrencies, and markets, knowing that the underlying mechanics remain constant. With proper risk management and consistent execution, this strategy provides both the financial potential and the time efficiency that professional traders seek.
Remember: the path to trading success isn’t about finding the perfect indicator or the holy grail strategy. It’s about mastering a proven framework, maintaining discipline during execution, and continuously refining your ability to identify high-probability opportunities. This strategy provides that framework—the execution and dedication remain yours to contribute.
Key Takeaways:
- Scalping is about timeframe-based trading, not necessarily small moves
- The three-step process (marking highs/lows, confirming wick rejection, sniper entry) forms the complete framework
- Focus on high-probability levels: imbalances, structural points, and session-based areas
- Maintain high reward-to-risk ratios (4:1 to 5:1+) for positive trading expectancy
- Quality entries trump quantity for long-term consistency and higher win rates
